When I remodeled my kitchen I sketched the cabinet positions on the wall. I also drew the fridge with food, and the oven with a turkey in it.
17 Likes
That’s a great approach!
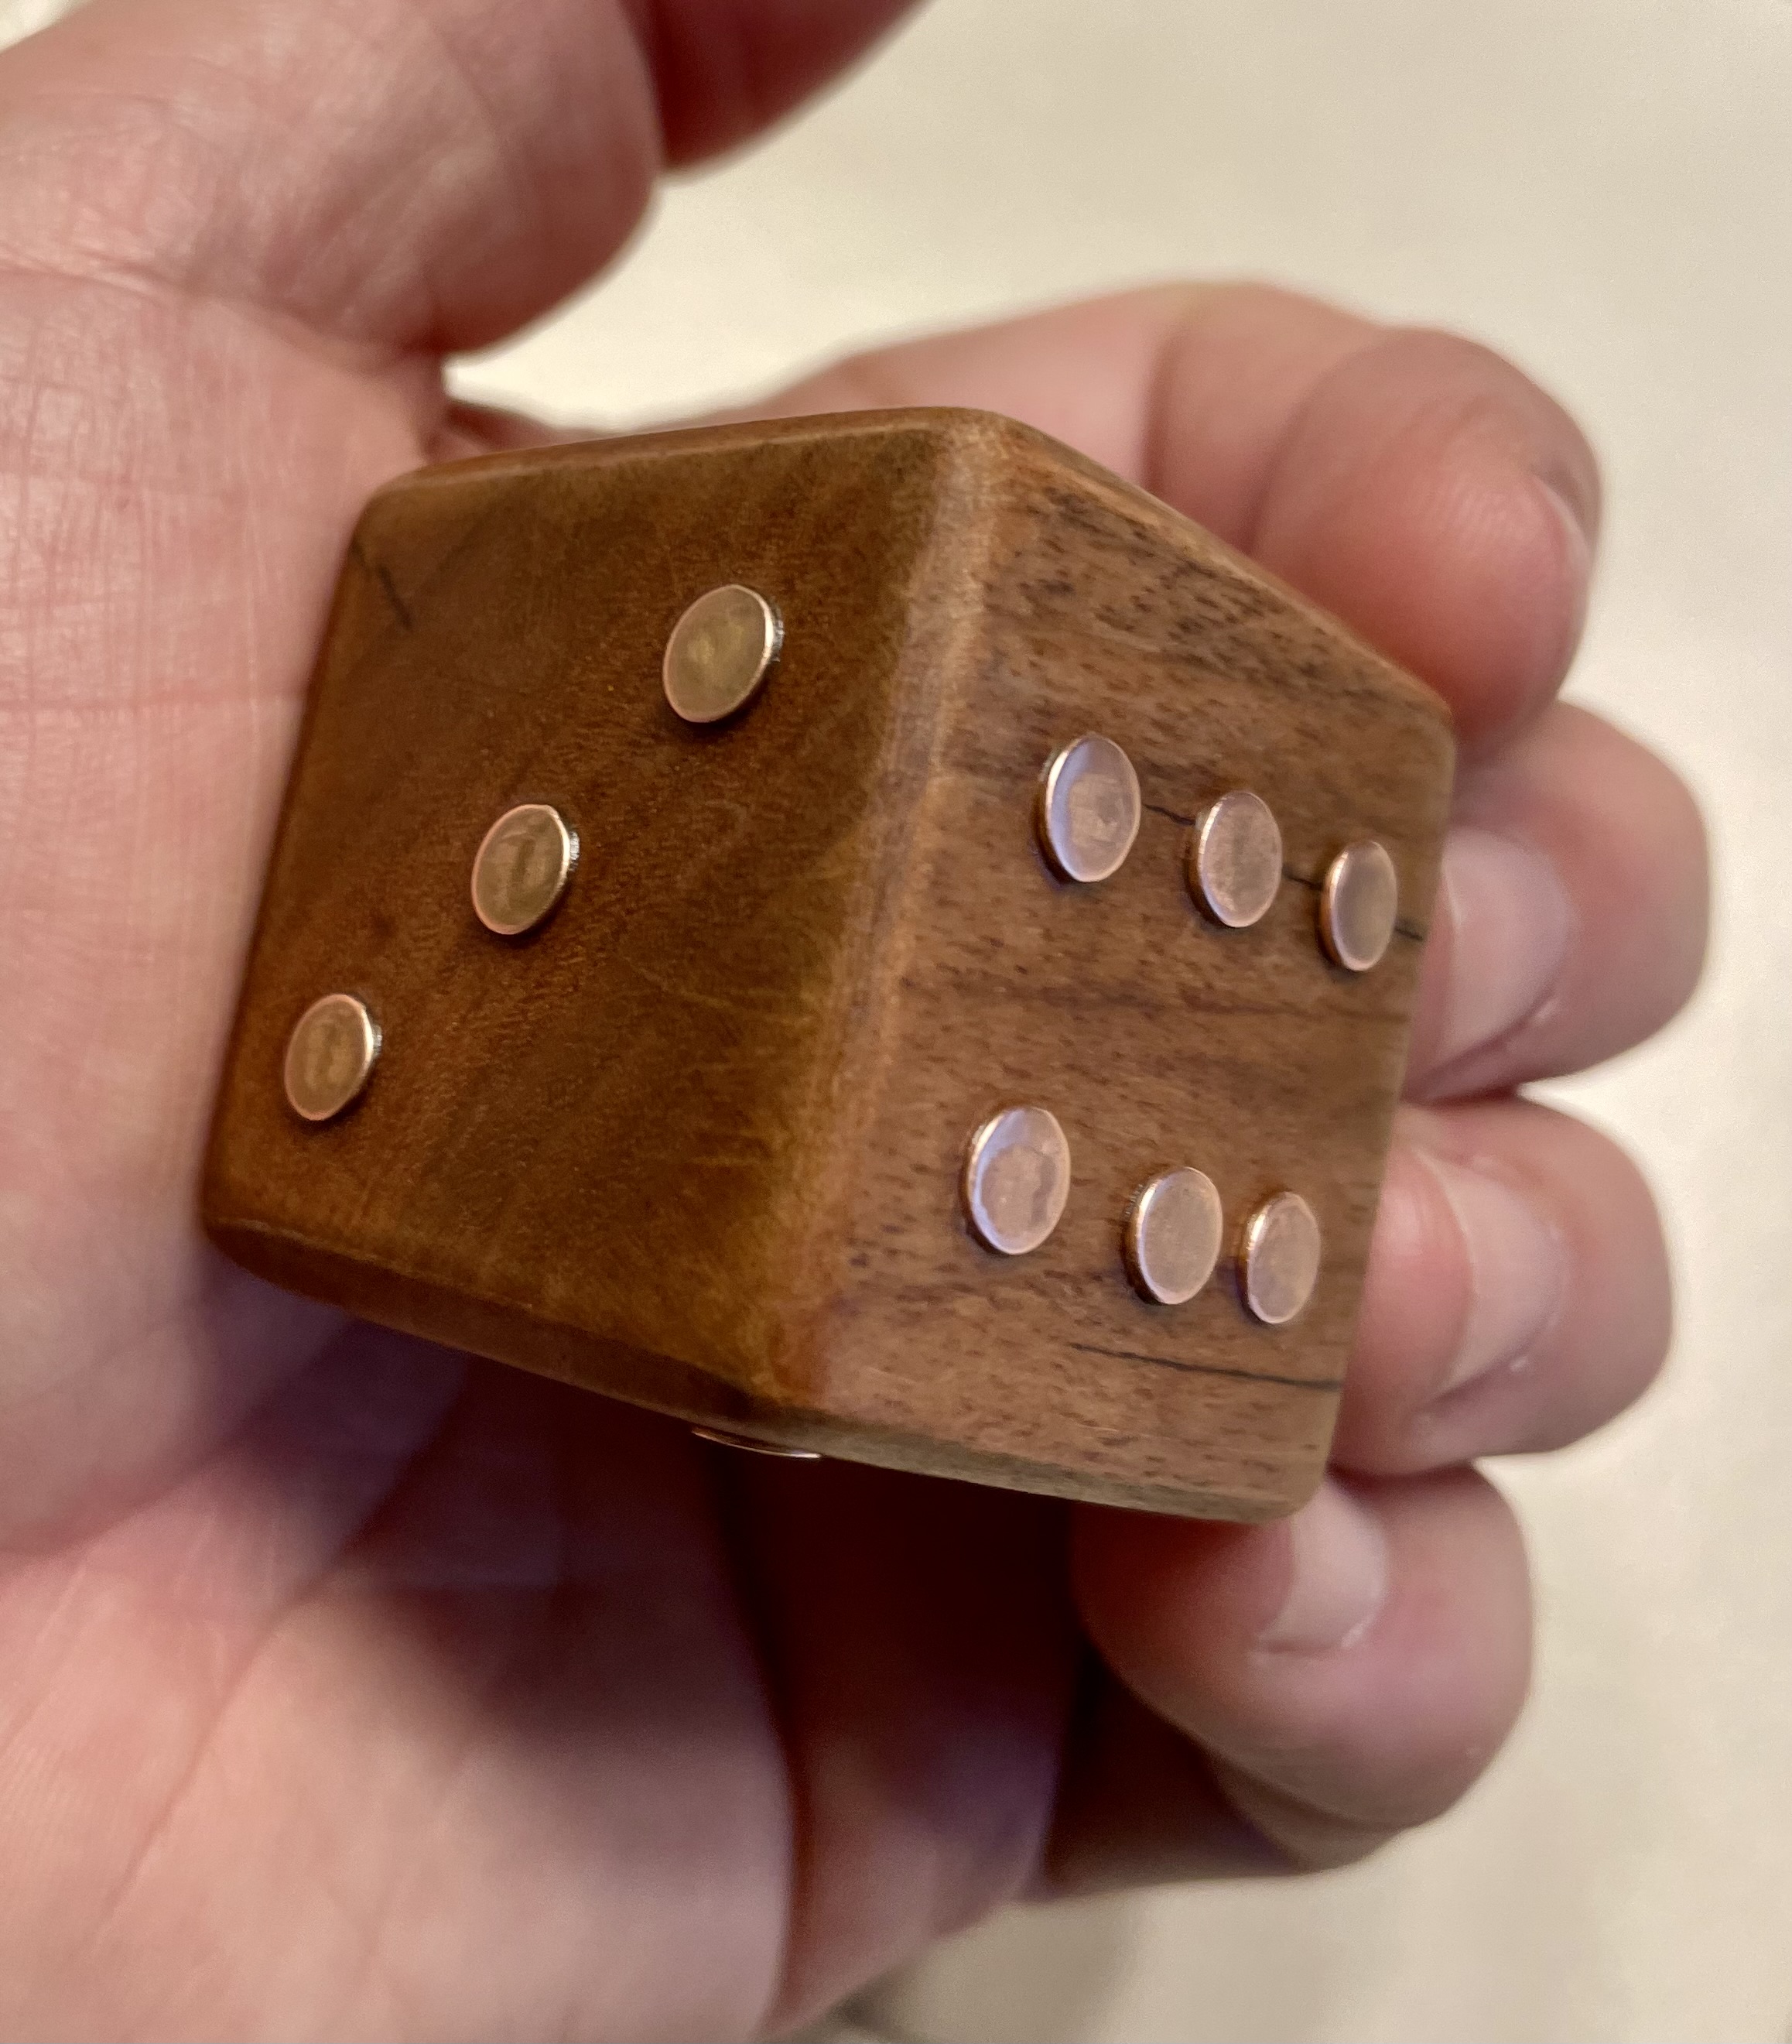
In my woodworking I often end up with cubic offcuts. I had a bunch of them and turned them into dice:
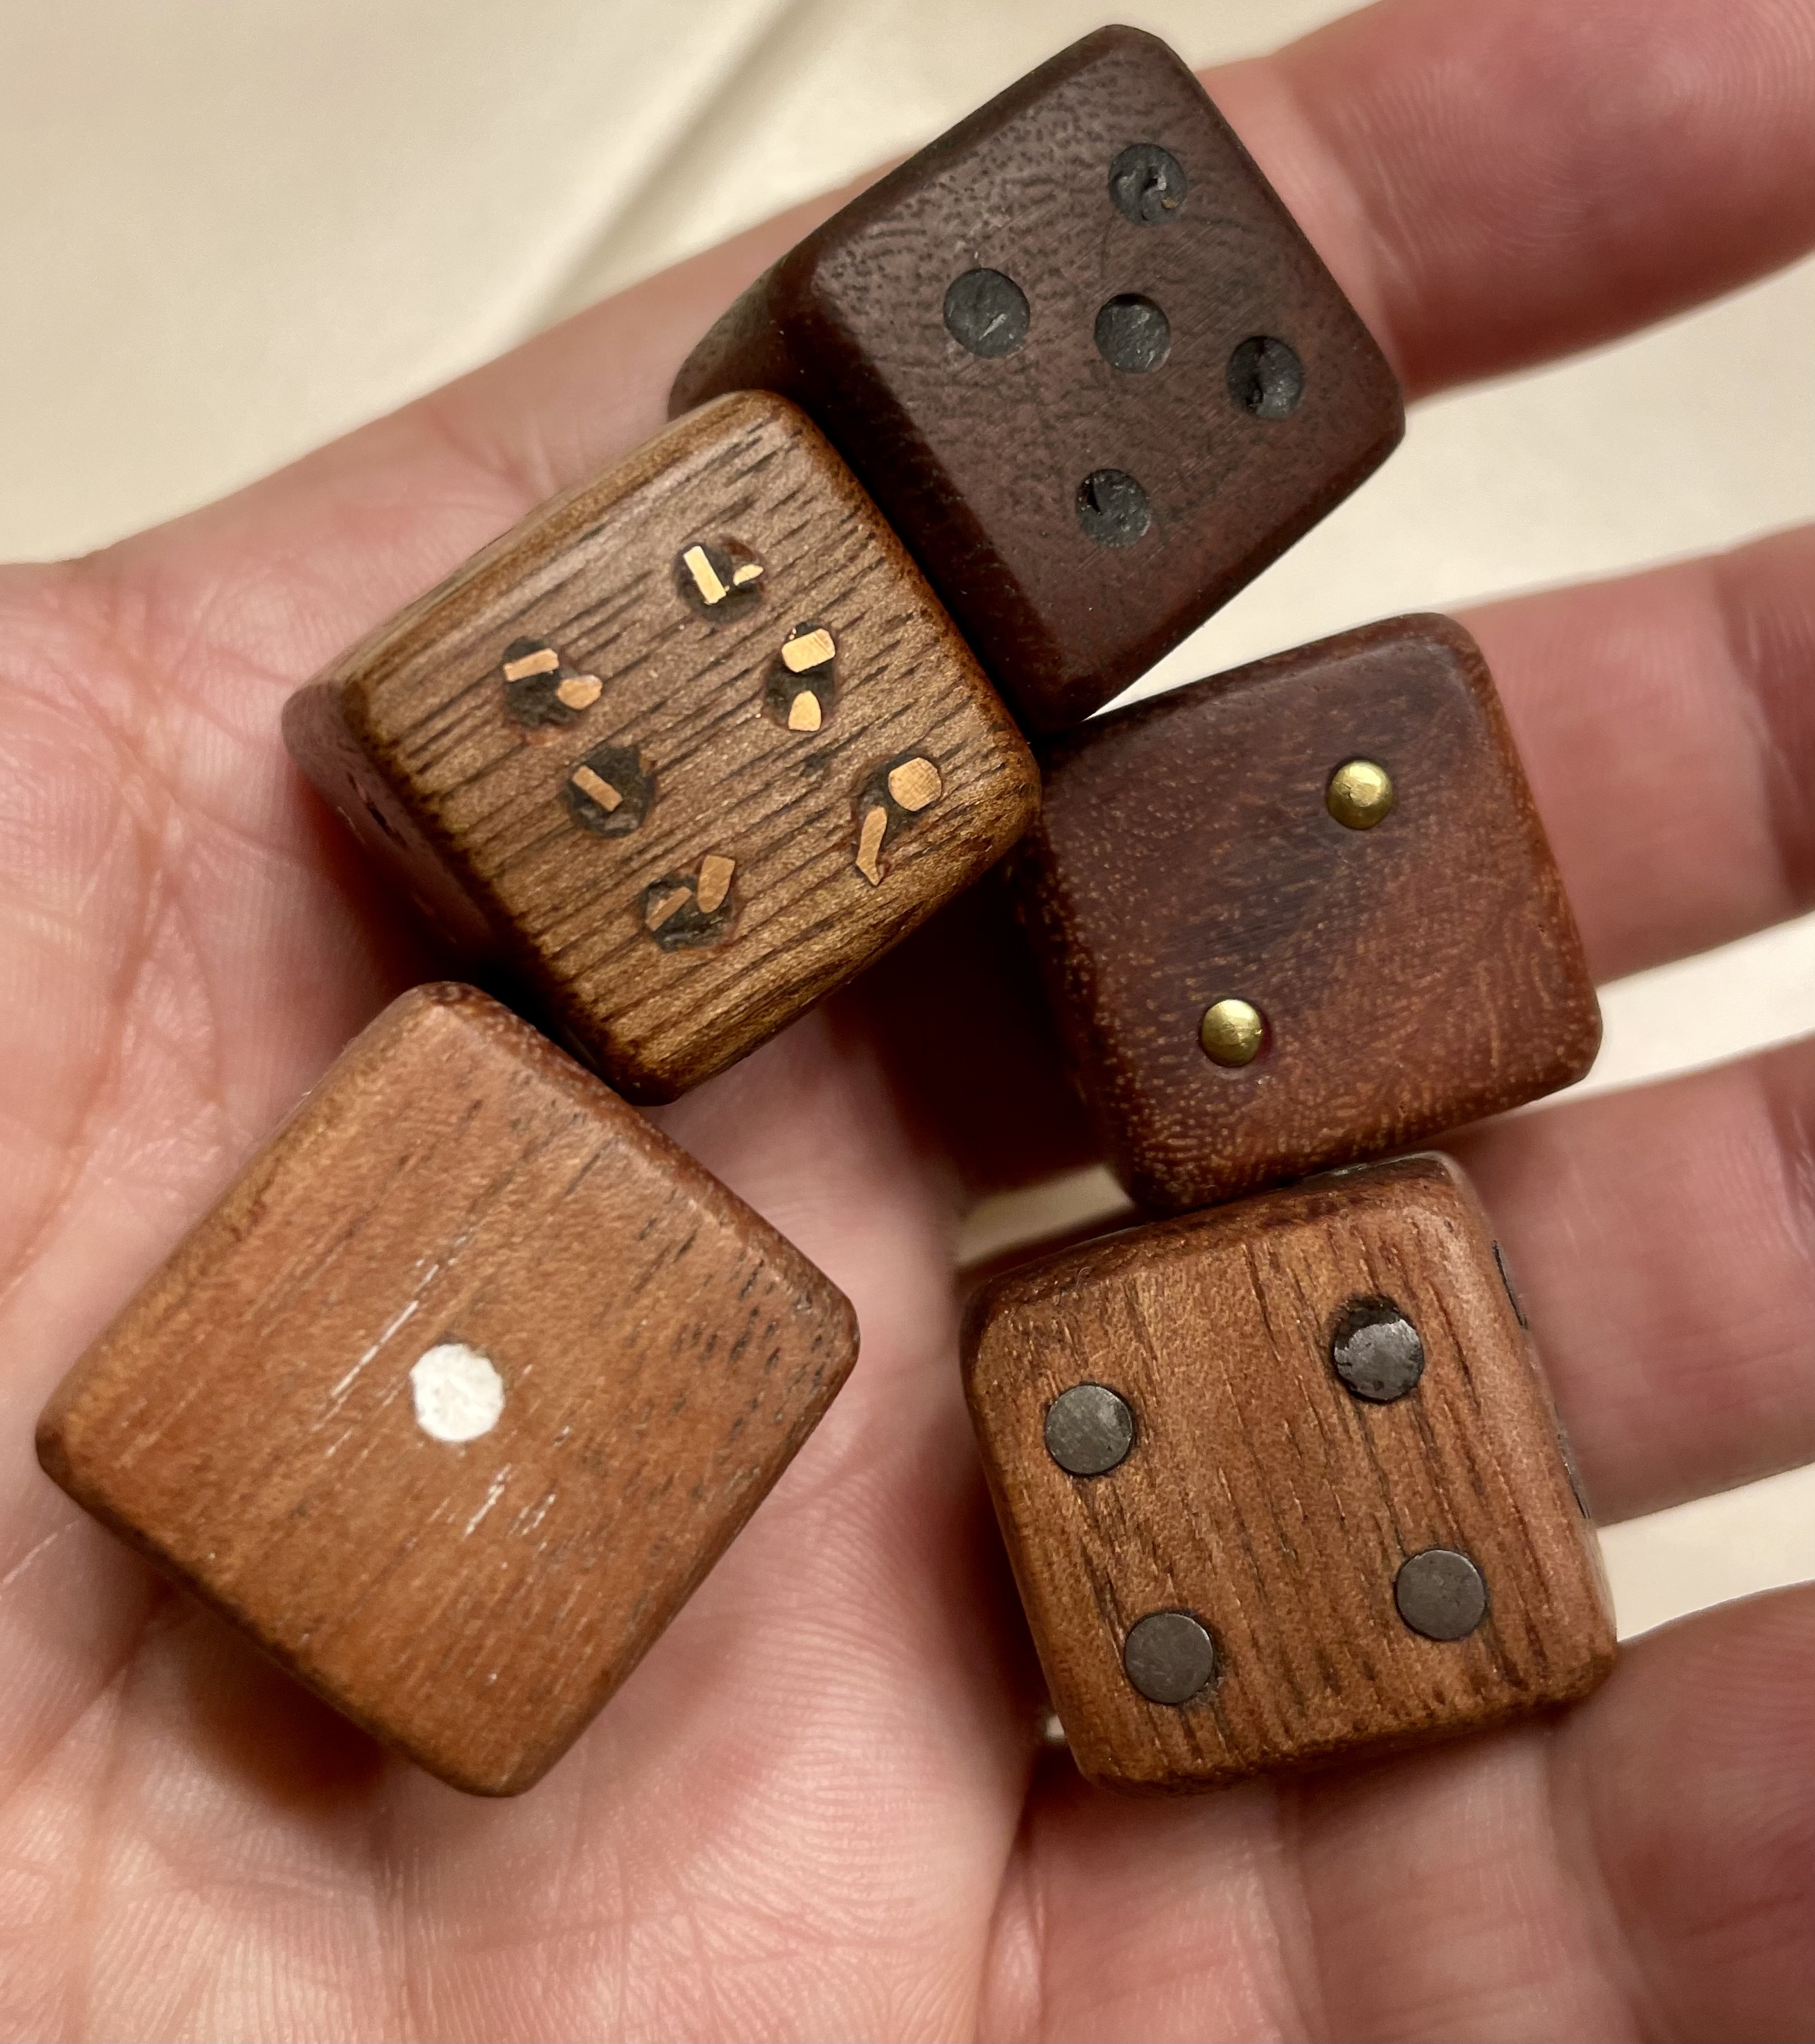
These are ~3/4” cubes. I’m working on a big one from madrone that’s 1.5” cube.
19 Likes
For your beautiful beetle drawings I would suggest Bristol Board (and a good fixative).
Yep, I recognise that feeling.
8 Likes
Thanks! I’ve seen Bristol Board recommended elsewhere, and a fixative is a good suggestion; I have noticed that the pigment brushes off easily.
I need to work out my rustiness doing some drawing on lower stakes paper. And as for watercolour, I bought a cheaper, but still 100% cotton paper that I designated as my learning paper, that I do lessons and practice on. The Saunders Waterford, etc. will be for when I feel more confident.
8 Likes
Now do a 20-sided die!!!
13 Likes
I’ll take a mimic ![]()
7 Likes
been working on a D20 and a D10 for DB.
mum is going with poured polyster resin and i an trying cast aluminum or pewter. will mark them in the laser engraver.
will they ever be true? we shall see!
11 Likes
Wow, that’s awesome!
Sadly, I don’t know how I’d do the numbers, much less get the facets right. Square I can do. Repeating exact crazy angles is not in my skill- or toolset. And I don’t have a laser engraver or CNC to do the numbers. I start topping out even trying to fit six dots on a 3/4” surface!
10 Likes
I’m not suggesting this is actually something to try, but that made me wonder how someone would make that shape. It’s not possible to slice off a plane just given three points that should be on it, is it? Because then you could start with a cube, mark two points on each side, and then cut it down.

12 Likes
Easy in theory. I agree with @DukeTrout, no clue how I would even begin to do that in my home shop!
11 Likes
Even the jigs to hold such a thing for cutting would be works of art!
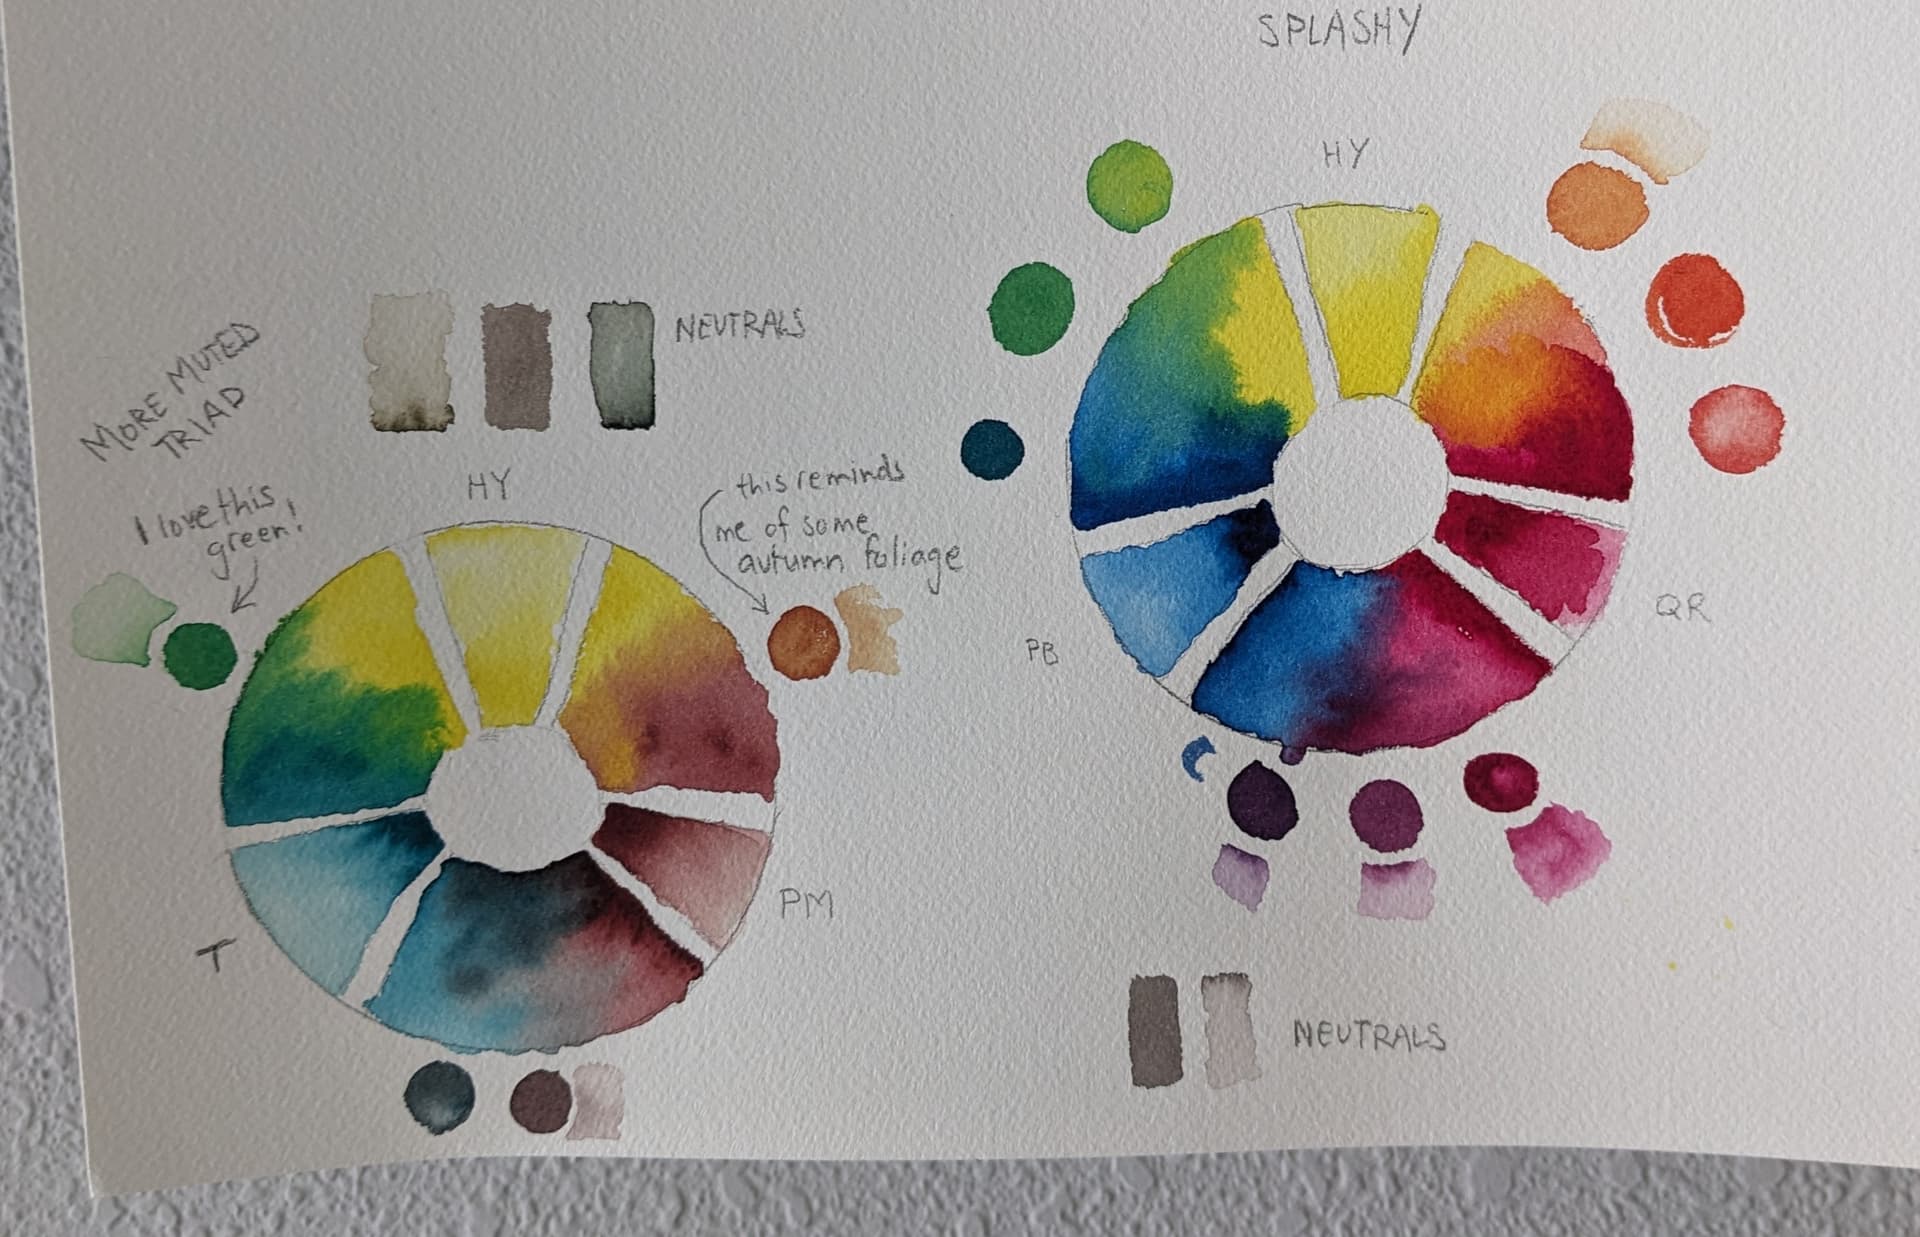
@OWYAC I saw a good tip recently for watercolor, but imagine it applies to pencils, too. Do your color swatches and blends on the paper you intend to use. You end up with a sort of recipe book for your colors, since they show differently on the different media. It’s been getting me over the hurdle of daring to draw on all that pretty paper.
Eta: here are a couple samples I did the other night, learning to work with triads.
16 Likes
Well, it doesn’t strictly have to be single cuts. I am guessing it could at least be done by whittling or sanding each of the eight corners down to the appropriate planes…that seems like it would take an exceptionally long time though. The sort of thing that you want to save for enchanted wood.
10 Likes
That was the first thing I did with my watercolours! ![]()
11 Likes
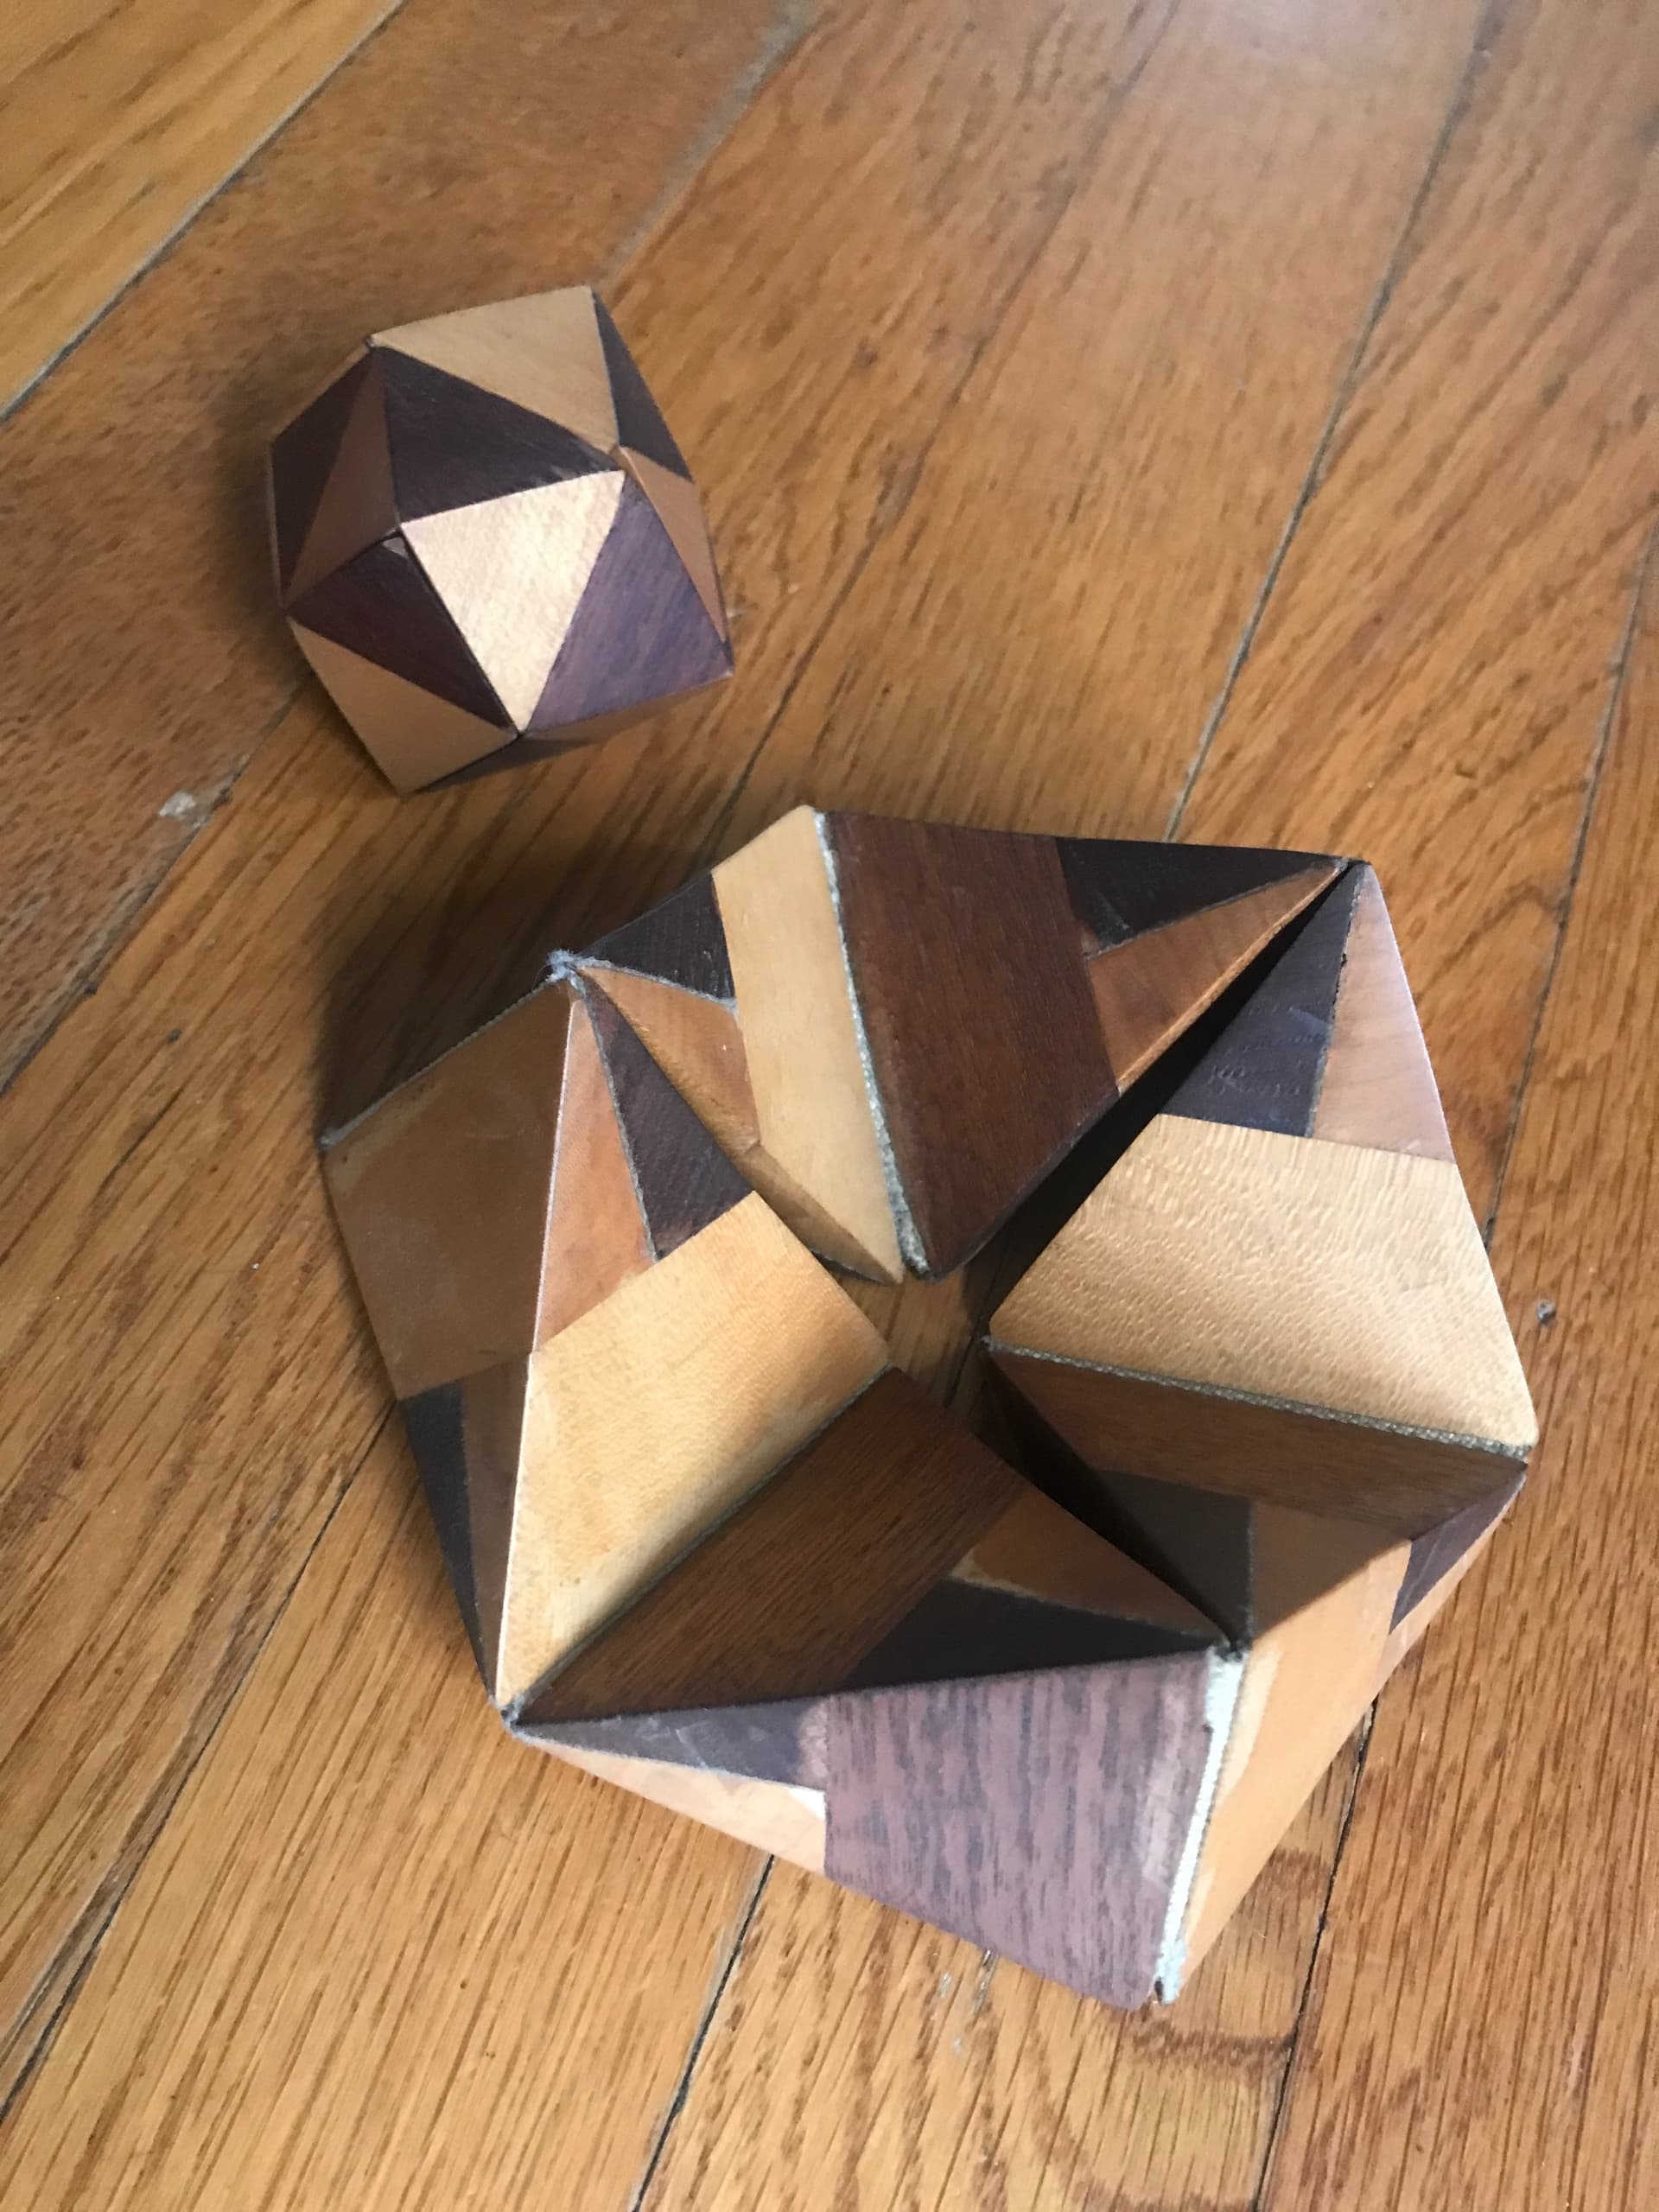
One way to do it IRL with a solid block of wood
Another method is to make it hollow and focus on making each facet separately and gluing it all together ![]()
11 Likes
Probably the same way that people make dice from crystals and gems - with a precision angle armature and a rotational sander/polisher. There are some amazing artists who make these works of art.
I don’t know of such tools for wood. If one is working on the same scale as the crystal dice, then I would expect the same tools would work. Working at a larger scale would probably require bigger tools.

ETA: Thank you for that link, @Grey_Devil! Still looks very difficult, because as you cut, you’re losing your reference faces. One trick I learned from Cam at Blacktail Studios is to glue your reference surface cut-offs back onto the piece with something firm but removable, like CA glue. Then you can still measure and cut from your reference faces as you go. You’re basically re-assembling your original piece as you go, then removing everything at the end.
13 Likes
I think it would be possible to do it as described but yeah putting back some of the cut faces might help make it less confusing.
9 Likes
I think I would try cutting 20 tetrahedrons (not regular, outward facing facet different from the others) and gluing them together, similar to making each facet separately but not hollow. I think this could be done by ripping one of the angles on a table saw, and the other two on a cutoff saw, at the same angle alternating the direction.
7 Likes
I did this rhombic dodecahedron and these tetrahedrons with this method successfully. Both only require one angled rip and a single compound (dodecahedron) or non-compound (tetrahedrons) angle on a cutoff saw.
16 Likes
The only thing with that is that you have to get the angle exactly right or there will be gaps. I was thinking that lengths might be easier to measure than angles. And incidentally to calculate – the distance between the points on the cube is the side length divided by the golden ratio.
11 Likes