My dad put me on to a Raspberry Pi project called the PiHole. It turns your Pi into a DNS server- but it has a huge list of ad serving domains stored. When you request a webpage that makes a call to one of those ad-serving domains, this DNS box never makes the request. This is different than ad blocking- the ad never comes in this case, because it never calls for the data. It’s lovely- web pages are much nicer to use this way. And I don’t have to worry about browser plugins, or whatever else. AND anything on my home network automatically goes through this DNS- so it works on every device in the house. Obviously it’ll do white listing and all sorts of other fine tuning.
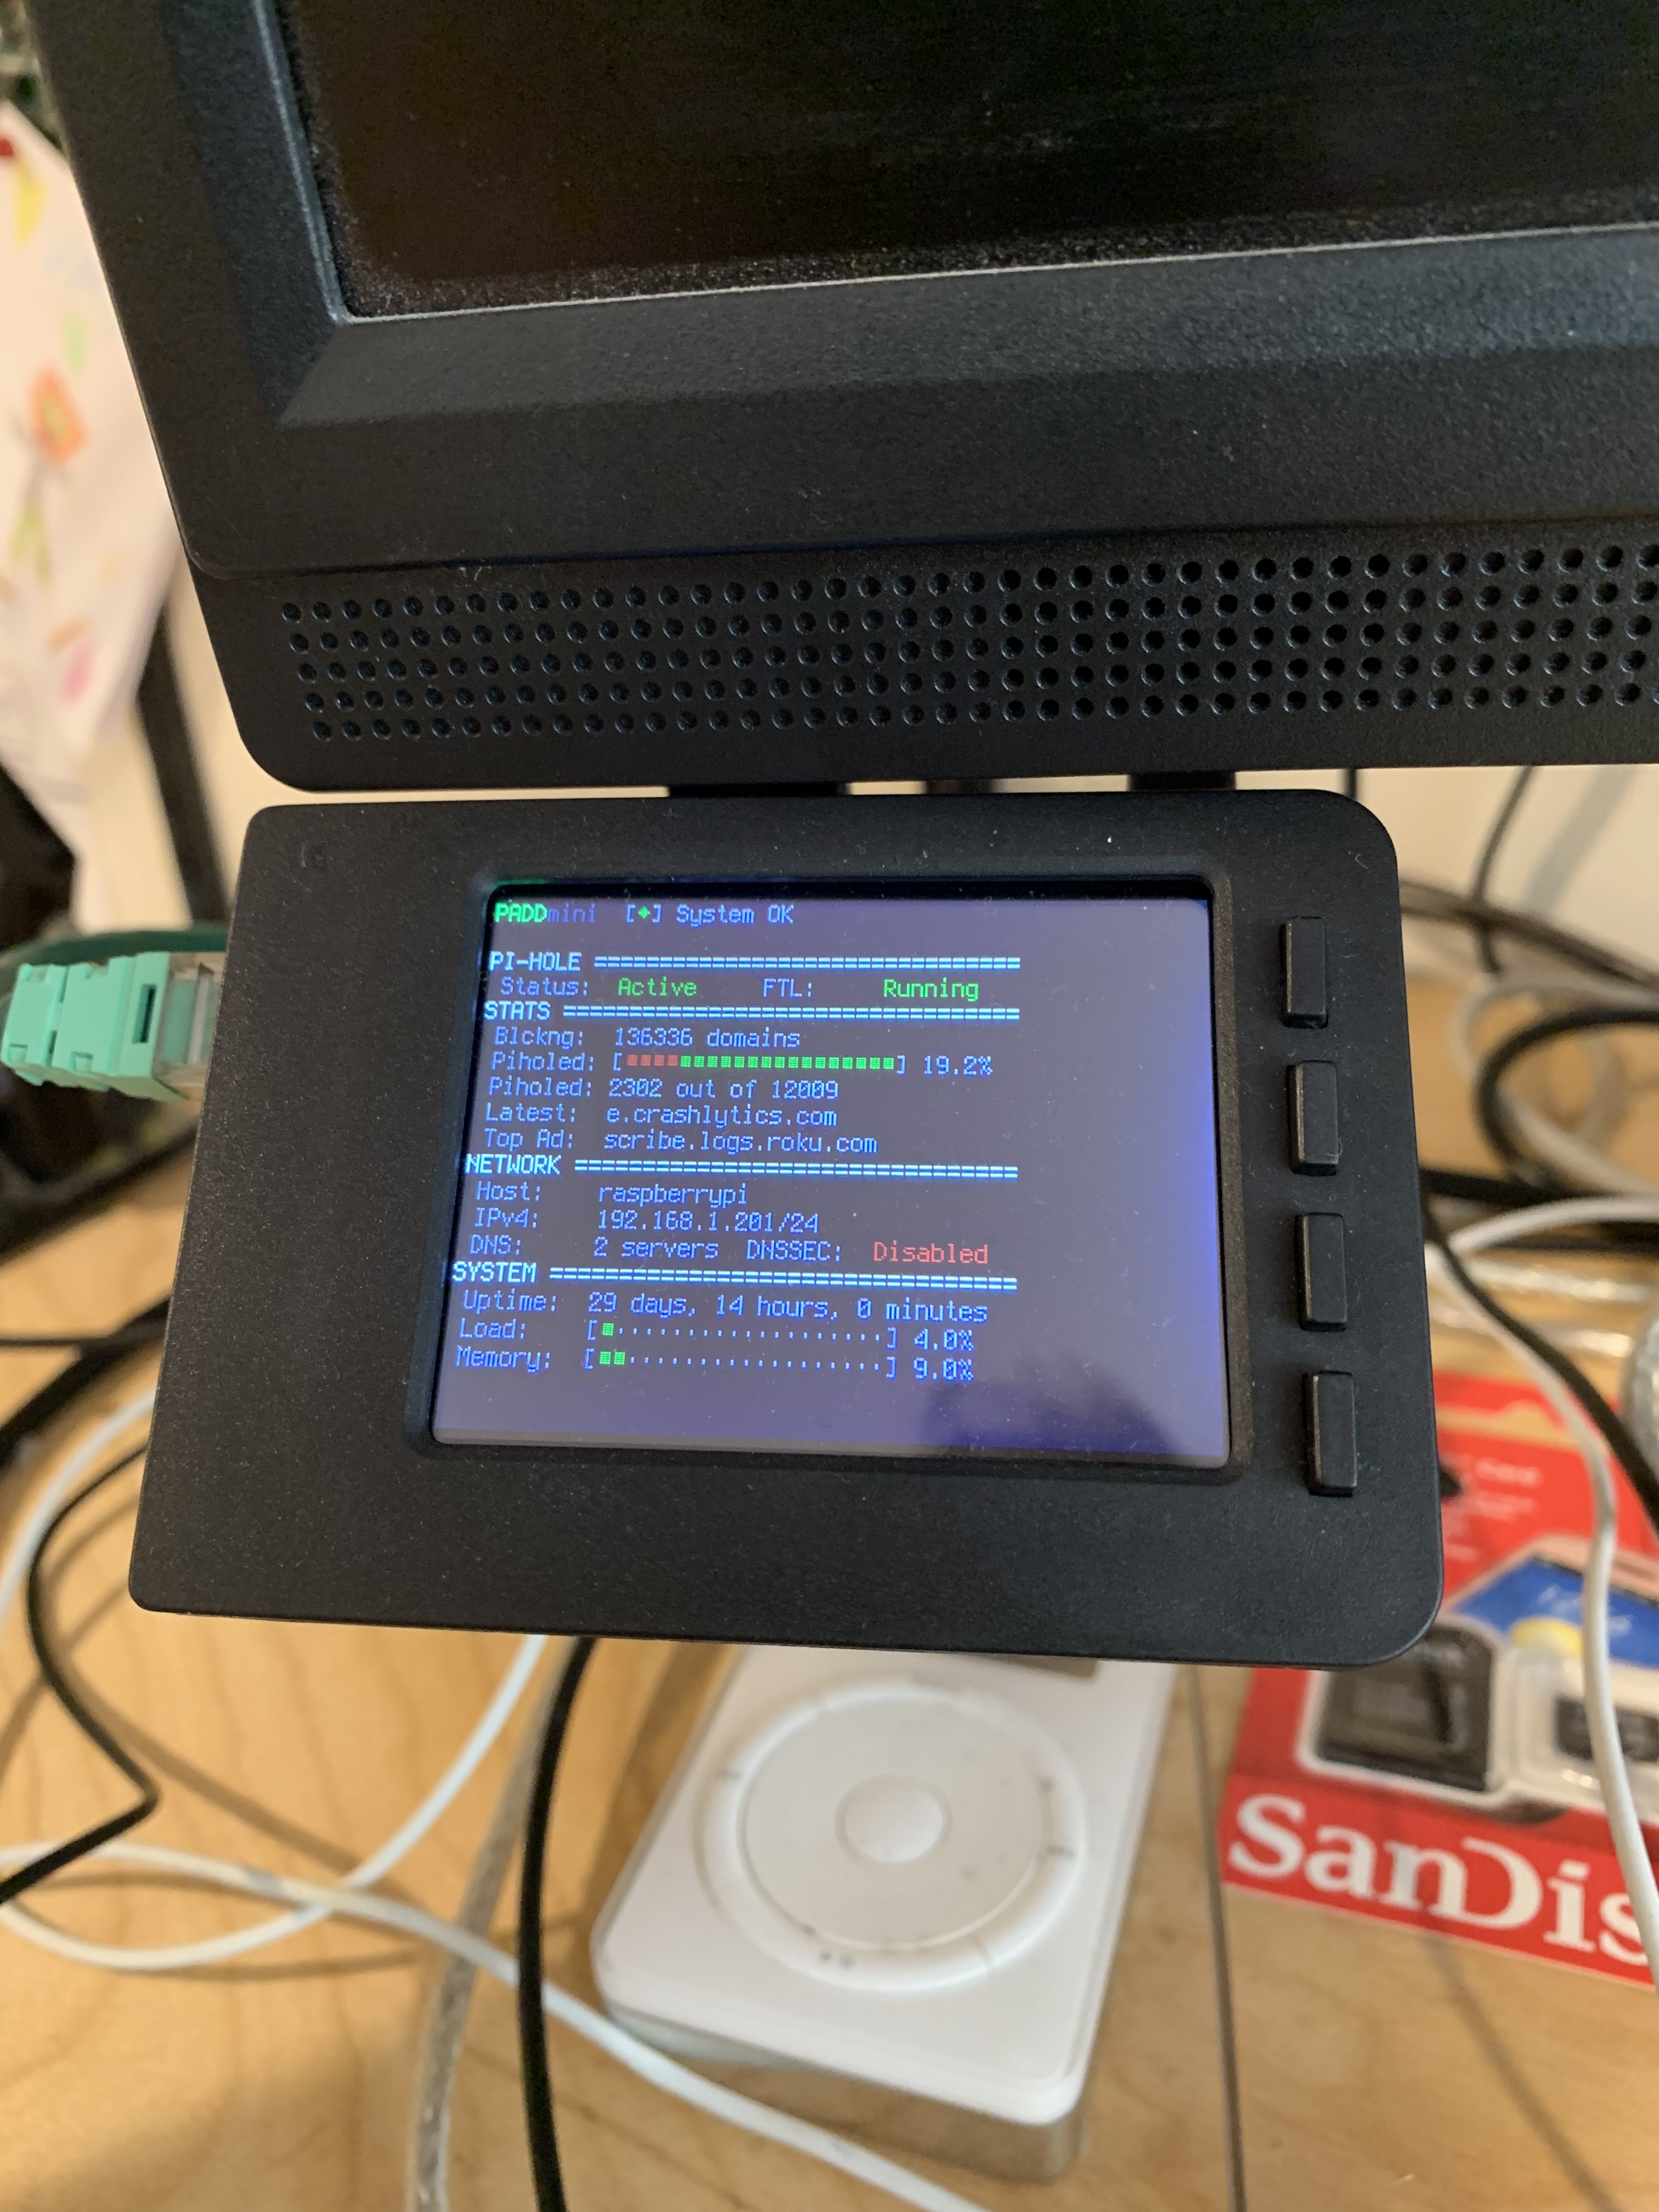
Because I’m me, I bought a kit to do this from Adafruit that had a Pi 3, an enclosure, and a tiny lcd screen. Strictly speaking, nothing but the Pi is critical. But the enclosure and the screen are pretty rad.
One of the oddball upsides to this has been to breathe some new life into my 10 year old computers. With all the less data/is/hot garbage to load, webpages are much lighter weight. Formerly heavy sites now load lightning quick. I’m a cheap bugger when it comes to computers, but I’ve fickle taste too, so there’s always a balance for me to strike when I pick up a new machine. Because I use Macs, my options tend to run towards the used market. My current daily driver is a Mac Mini (Early 2009) Core 2 Duo that’s got 5gb of ram and a SSD I’ve added. With the PiHole running, it’s totally lovely for web-based work. Video editing? Not so much.
Anyway.
Thought some of you might find it useful- either as a project for fun, or as a practical and inexpensive way to keep older computers relevant and useful.
I repurposed an old first gen Pi to be a Pihole. It sits with all my other network stuff powered off of a PoE to USB adapter. Even for such old hardware it works great and other than occasionally having to tweak its rules when it gets overzealous with its blocking it basically runs itself without needing any intervention. A great little device. Looking at the dashboards it seems to block some 25% of my devices’ DNS requests.
The great thing is using apps is so much nicer now since many of the ad networks are blocked so places that would have once been filled with ads are now empty boxes. I can really tell when I’m not on my network because even using stuff like Apple News on my phone becomes a carnival of fucking ad tiles everywhere.
Best thing of all is it took almost no time at all to set up.
Oooh, I may need to try this on an old Pi that’s sitting on my shelf waiting for productive employment.
I’ve traditionally used an ad- and malware-blocking hosts file on my desktop workhorse. While it’s easy and cheap and works nicely, it ONLY works on the machine(s) it is installed on.
Excellent post. Thanks.
Pi-hole is one of those little projects that I’ve wanted to try for a while now, but never quite made the time to sort out the details and get started.
But when I saw your pic of that little display, and then realized I could get the same thing as a kit w/out having to put any thought into it myself, I knew it was time to act, and decisively impulse-purchased the whole thing.
It arrived yesterday, and I got it set up this evening. It’s my first pi, and I was pretty impressed with how well thought-out the kit was. The sd card coming pre-flashed with the expected OS was a nice touch, I thought. The tutorials were a bit haphazard, but overall better than I expected and sometimes delightfully good (like when I was like “doh!” at this weird error message I didn’t want to have to troubleshoot, then at the end of the page it says “and if you get this exact weird error message just do x” and I did x and it worked!).
I haven’t set the router to use it, yet (I’m out of outlets near my desk, so I’m not sure where its permanent home will be, at the moment), but I pointed my phone at it and holy smokes!, is the difference dramatic. Mobile web doesn’t entirely suck, now.
So anyway, thanks for the inspiration.
ETA: my only disappointment is that the buttons don’t do anything. I don’t know what I expected them to do, but still.
I’m happy to hear you like it!
I pointed my router at it, and then as a fail-over, put in the secondary DNS server of 1.1.1.1. It’s made a serious difference in my web browsing on my ancient computers.
Also: it’ll want/need to be updated from time to time- you’ll have to ssh into the PiHole for that, but the PiHole folks have a super-straightforward guide to that here:
It’s really easy.
And the PiHole is automatically updating it’s blocked IP list about once a week- so that’s rad!
Or set the Pi-Hole as your DNS server from your existing DHCP server
Or manually configure your devices to use your Pi-Hole as your DNS server if you’re not ready to fully commit
It’s very low effort. I currently have it manually configured like in my step 5.2 rather than in DHCP mode since I’m still worried about the WAF, but it rarely gets in the way and I’ve been using it for about 6 months now.
and then followed these step by step instructions:
To be clear: you don’t have to buy the first kit- literally any Raspberry Pi can do this. Heck, you can even run the PiHole software on tons of other types of machines. The directions are super easy to follow- especially if you’re just running a regular Pi for this (and not the kit with the display that I’m using- 70% of my effort was just getting the display working properly).
Ouf. Because I was a good girl and didn’t spend a lot of money in the last month, I was going to treat myself to the Ada Fruit kit today. Except with taxes, customs, international shipping, and conversion to Canadian currency, it was going to be around $100, so I backed out.
This. This is why I get so close to buying Raspberry Pis and then back out all the time. I need to find a domestic option.
And that made the Raspberry Pi Hole move up the “things to do” list for me.
I found a Pi 0 W (same kind Ada Fruit used for their kit), including power supply, for CAD $40 on Amazon. Since I currently have Prime to watch Man in the High Castle, and since I got a gift card for Yule, it was effectively free.
Now I need to dig up a suitable micro SD card from around the apartment and download an OS and Pi Hole to it. Sounds like a fun weekend project to me – if nothing glitches.