I’ve used split rivets like the one you show om leather, where you can sink them flush, but I don’t know how well they would work on something that needs to rotate. The same goes for the split-pin paper fasteners.
There are eyelet tools that are simply a pin with a shaped end that are driven with a hammer. Maybe a shoe repair place would be able to install one.
There are copper and aluminum solid rivets that are meant to be driven over a washer (the small washers intended for pop rivets are a good size). I may be telling you something you already know, but the trick is to use a ball peen hammer and go taptaptaptaptaptaptaptaptaptaptaptap…, not BANGBANGBANG, moving the hammer with each tap. Stop before the last tap that will lock up the gadget forever.
Tandy Leather sell two-part rivets that are set with a setting tool and a hammer. My preference is to slowly squeeze the parts together with a c-clamp, which gives a neater result.This kit should give you plenty of practice stopping short of an immovable bond.
excellent suggestion, that!
i also wondered about very short pop rivets that would have a wide enough flange, yet allow for a turnable dial (wheel).
above all, it is the positive centering of the hole and the “slop” of the fixing axial device.
One more thing to think about, I would like to use a fastener that has a hole through it, like a grommet or a pop rivet but not a screw post or split brad. These boats are small and there’s not a lot of room for gear, so everything gets lashed down or tied in in some way otherwise it can get lost. Anything I can loop a string through would be really helpful. Of course I can also drill a hole near one edge, probably will do that anyway
The problem with pop rivets is that they won’t break off the pin until they are fastened very tighltly.
Another very simple-minded approach just occurred to me, and that is to use a small machine screw and nut (washers on both sides). This has the advantage of being very adjustable. You could cut off the screw flush with the nut and peen the end to make sure it doesn;t fall apart.
That’s probably the best approach. A lanyard attached at the center might be annoying.
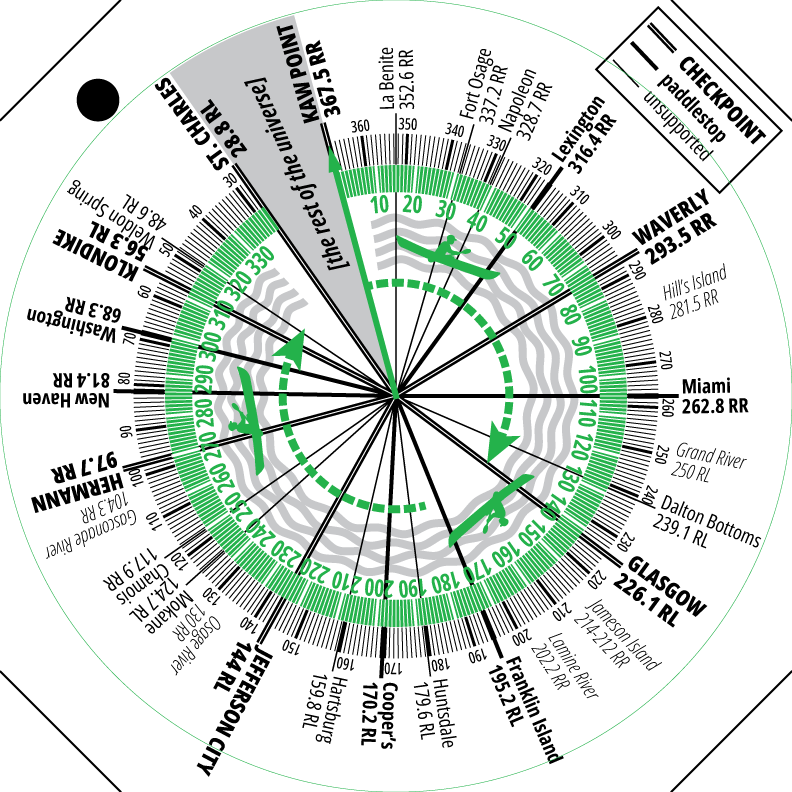
The rotating green part will be printed on transparency material. Green will show up better under red light. The black dot is for a lanyard hole. The square is 5.5" on a side, so I should be able to have these printed 2-up on letter size paper. The square design also leaves more room for the legend and for longer names (“JEFFERSON CITY” now fits). I might add more info or text into the other corners later. (“DRINK MORE ELECTROLYTES!”) Not sure yet if I want to cut off the corners as shown.
If you have the thickness of styrene/acetate a 2mm binding screw might be sufficient (although I would look for a stainless steel one). You might need to shim with a spring washer/washer.
Alternatively a plastic popper (Amazon link) will rotate (but may also separate)
There is also “plastic paper” that’s safe for laser printers. Comes is A4 and in adhesive and not adhesive variants. The results are quite weather proof; at least long enough for something like this. I used this for the “Caution! Lawnmower crossing!” signs I made earlier this year (I think I posted photos). Adhesive foil, printed with laser printer, mounted on 3 mm “plastic cardboard”.
I concur with @j9c; should be circular or at least have generously rounded edges.
And a lanyard. And a little pouch to go in.
So long as I’m making these in small quantities, I probably won’t have much choice about the materials or UV resistance yet. But all good points, thank you.
Also a good point. Most people will be using these for 72 hours or less, once a year. Cheap and disposable, or costly and durable?
Along those lines… The org I work for, and who manages this race, is dedicated to keeping plastic out of the rivers. If my mileage dials are cheap and disposable, will they end up as plastic trash? Maybe use compostable materials? But would that hold up to many hours in adverse weather?
Lots to think about in the long run. For now, it’s just an idea.
I can think of a possible alternative to using plastic or paper might be to make the wheel guide out of waxed canvas or some other type of fabric. You can probably glue some stiff paper or cardboard to it to keep it stiff. There’s still the matter of the front of the guide that will need to be transparent though.
I don’t really know how these will be used, but would it be useful to be able to lock the dial so it can’t be jostled out of position? If so, a variation on my machine screw idea would be to use a wing nut on the reverse side of the dial to adjust the tension as required.
No need for a lock, I think. All the people using this device will be moving most of the time.
As for use: These devices would be used by participants in a river race, their ground support teams, and safety crews. The idea is to facilitate measuring distance between any two points on the race course, which is often difficult to do mentally, for several reasons: (1) All boat ramps, access points, etc. are designated in “river miles” (navigation markers), not course distance. (2) River miles descend as you travel downstream, from 367.5 (start) to 28.8 (finish). Mile zero, where the Missouri River meets the Mississippi River, is not on the race course. (3) The river flows only one way, as does the race, so calculating distance “forward” (from a racer’s perspective) involves subtraction. (4) Most racers suffer at some point from exhaustion, hallucinations, dehydration, and other physical problems that can affect their ability to do the math. The consequences of under- or overestimating distances here can be substantial and may make the difference between staying in the race or dropping out – or worse.
Perhaps the arrow on the rotary part should be more prominent (“YOU ARE HERE”). But I think most people involved in this event will intuitively get how to use it.
EDIT: I really appreciate all the great feedback from everyone who’s responding. Input from folks not involved with long-distance river racing really helps me think about it from a different perspective.
Those extensions, or tabs, or whatever you might call them, seem like a good idea…something to hold onto, or push with a fingertip, to turn the parts…
ETA: if you didn’t want a part sticking out, maybe the top disc could just have a hole in it for a fingertip, sort of like dialing an old rotary phone.
Laser cut and engraved metal would be durable, reusable and recyclable - and maybe not really that costly, what with DIY laser cutters these days.
It could even have a rough map on the backside.
Possible dual use as signal mirror and pizza cutter, too.
I can get a 6" square aluminum blank with rounded corners for $5.32 here. It’s white with black underneath (i.e. after engraving) so it could work well. I’m not sure my laser is powerful enough, but it might be worth a try. This would be the “bespoke” model, sold at the gift shop, LOL
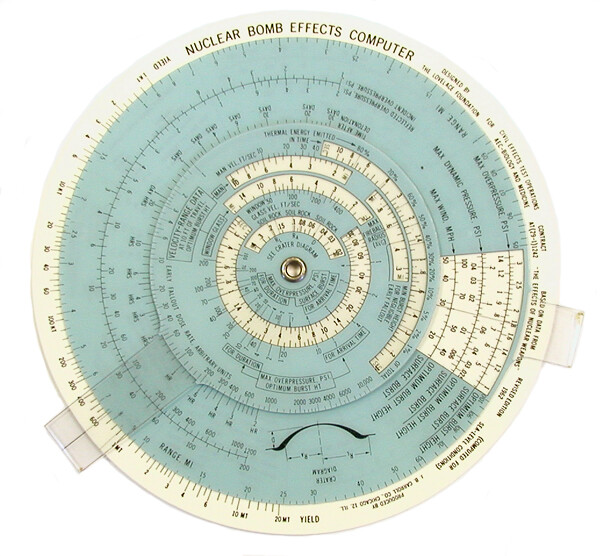
I’m not really expecting to make a lot of these (yet) or develop an actual sellable product. If it comes to that, I’ll probably go with flexo on plastic (like your bomb-effects computer) from my local printery.
@MrShiv Laser-engraved wood? UV resistant, biodegradable, good contrast with the right choice of wood and finish (maple with clear finish). The only thing you’d have to give up is some weight and probably colors, though if you are producing it in really low quantity, hand-paining would be an option and in large quantity silk screening would be feasible.
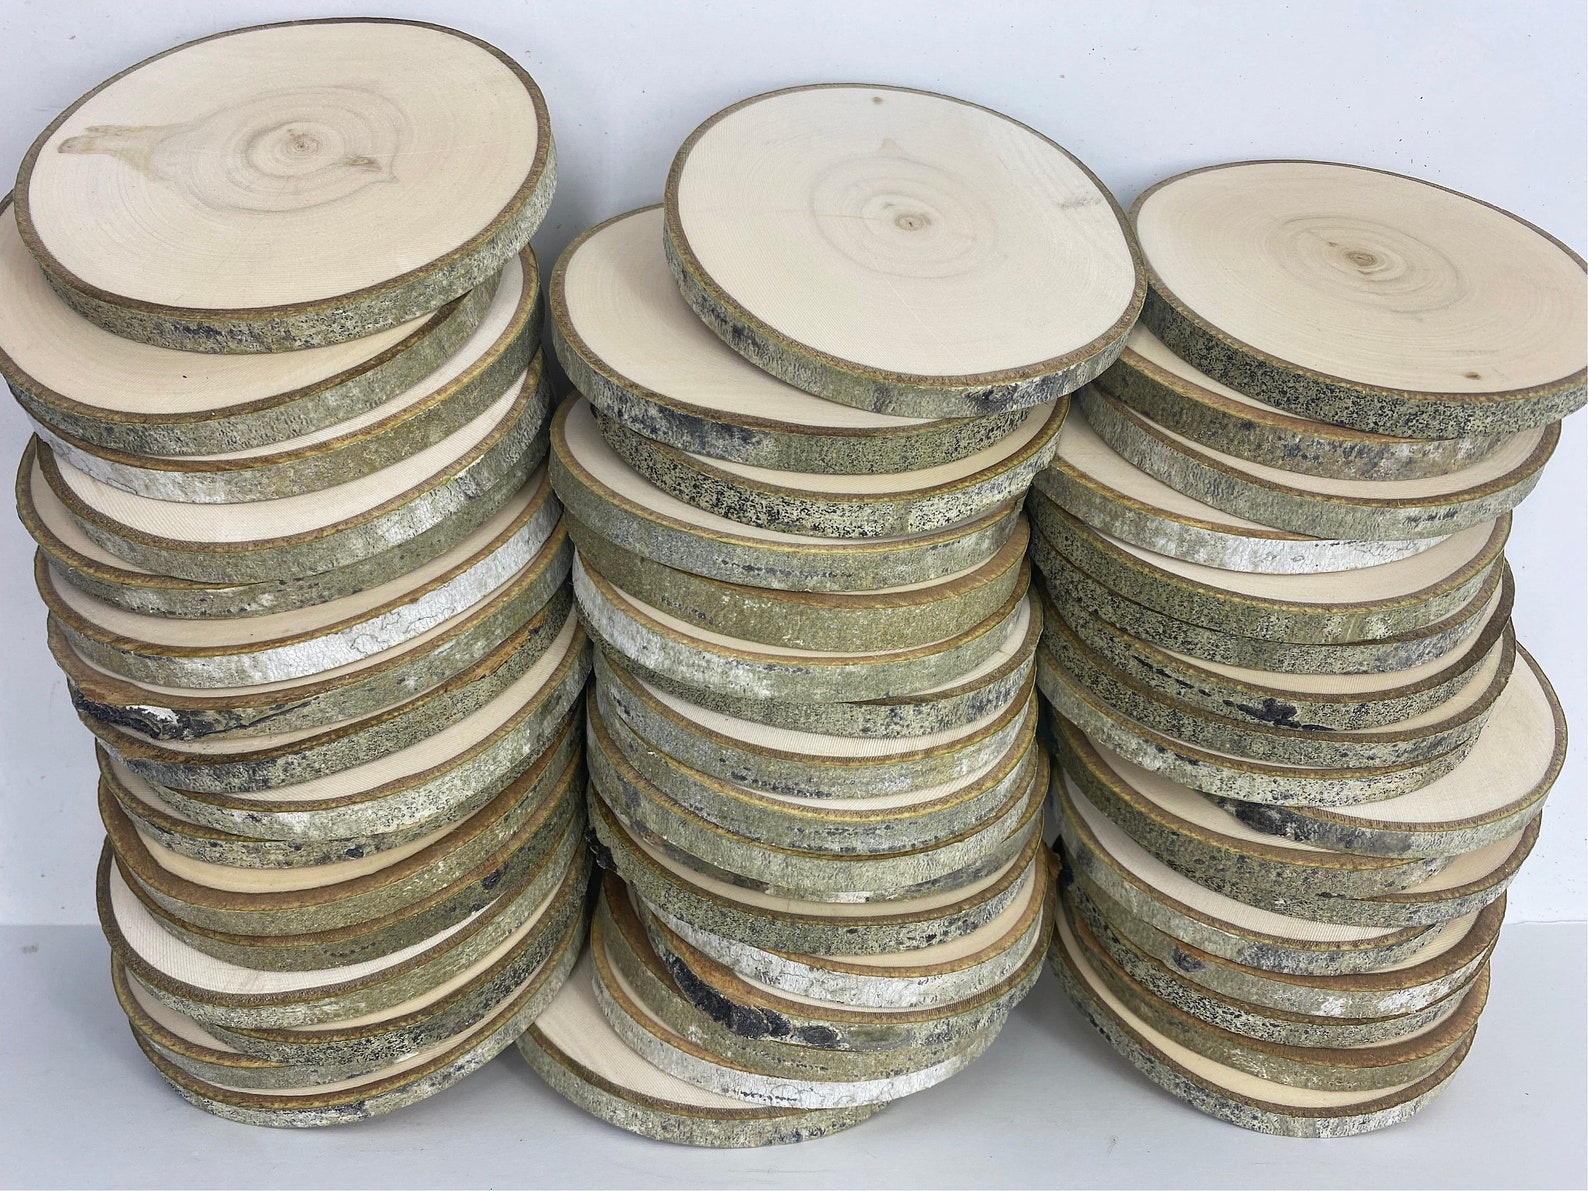
ETA: Thin project birch or maple plywood would hold up well, but if you really want to go for maximum aesthetics, branch cookies would look amazing!